17 January 2010

Tips for Paper-Piecing Quilt Blocks

I finished my Fall Swap wall hanging and will have it in the mail by the deadline. YEAH! I wanted to use a pattern that allowed me to incorporated all the great fall colors. I selected a paper-piecing pattern from Bright and Bold Paperpieced Blocks by Carol Doak because her patterns use - obviously - bright and bold colors. Perfect. The patterns also have a kaleidoscope look, which appealed to me.

I have never had luck with paper-piecing because the instructions I had were not very clear. I wasted a lot of fabric guessing what size to cut my pieces, and I had various other issues trying to line up the fabric, removing the paper without pulling stitches, and a lining up finished blocks. Carol's instructions looked clear and detailed, so I gave it a try.


Overall, Doak's instructions worked for me and I really like the results. The greatest feature in the book is the cutting instructions and measurements for each piece. I did not have to guess what size to cut the pieces.

As I completed my wall-hanging, I created a list of tips for paper-piecing that will make your experience easier.


    1. I am all about saving money so I used ordinary printer paper to print the block patterns. It worked, but with unnecessary difficulties. I highly recommend that you spend the few extra dollars and purchase the foundation paper. Foundation paper clearly shows the pattern through either side, it allows you to see the fabric through the pattern, and it tears easily when it is time to remove the pattern from the fabric.  


    2. Though it takes longer, take the time to fold the paper-pattern back on the line between the two pieces you are about to sew together. Align your ruler so that it extends 1/4" over the paper and trim the fabric. This will help you properly align your fabric pieces accurately.


    3. Even if the instructions say to stitch 1/4" on either side of the pattern lines, don't. When it is time to fold the paper back and trim the fabric to 1/4", you will have to rip the paper where your stitch goes past the line.

    4. Do not just finger press the fabric pieces open. Take the time to iron them. This helps to reduce the bulk where several pieces come together.

    5. Check out these other tips from Quilter's Around the World.
      Paper-piecing takes longer, but the results are fantastic. I have not had points so sharp or pieces align so accurately.

      If you have any tips for paper-piecing, please share them in the comments section.

      14 January 2010

      Squiggle Crochet


      Squiggle crochet
      Originally uploaded by sarah london textiles

      Have you heard of Squiggle Crochet? I hadn't either until I read my morning blogs.

      Sarah London featured this beautiful square she crocheted on her blog and Flickr. I have not been able to find instructions, but she does promise to have the pattern available in a Hip to Hook 2010 pattern.

      You can check out her blog at http://sarahlondon.wordpress.com/2010/01/14/squiggle-crochet/.

      09 January 2010

      Cute Patterns in Amigurumi Too! by Ana Paula Rimoli


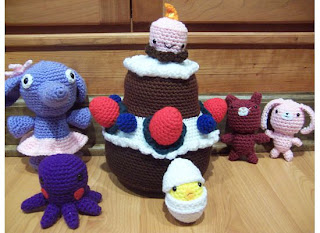
      I am still enthralled with amigurumi. For my niece’s third birthday, I crocheted more of the little critters in Ana Paula Rimoli’s book Amigurumi World and the birthday cake. I loved making up these patterns so much, that I purchased Rimoli’s second book Amigurumi Too!


      I crocheted this tea set from the second book over the holidays. I love how it turned out. The little spoons and chocolate chips really make the set.

      After today, however, I am getting back to my quilting. I joined the Fall Quilt Swap on Quiltinggallery.com. I decided to give paper piecing another try. My first attempt turned out okay, but it took me longer and I wasted a lot of material. I purchased Carol Doak’s Bright and Bold Paperpiecing book. The instructions look clear and easy to follow. I will let you know how it turns out. Hopefully by next week!

      In the mean time, have fun with your crafting endeavors, and I would love to hear from you.

      13 September 2009

      Amigurumi World and Panda Crochet Along

      I've been away in amigurumi-land again. Making these little crocheted animals is addictive. I just cannot get enough. I have wanted to make every critter in Ana Paula Rimoli's book Amigurumi World: Seriously Cute Crochet.

      I have a pretty good start, too. These guys are easy, quick, and I think the cutest out there. There are instructions for large amis, but I like the little guys. This book is well worth checking out.

      Also, I've joined a Crochet Along. This is a new experience for me. I know how to crochet, so I was not sure if I would get anything good out of crocheting with other people, but I could not resist the ami. It is a fuzzy panda. The yarn is brushed to make it look like fur. I figured that joining the Crochet Along is worth it, just to learn the brushing technique. If you hate working with those special fuzzy yarns, then this is the perfect alternative.

      Check out the first lesson. There are several YouTube videos to demonstrate special techniques for the Fuzzy Panda. The best tip is to give your yarn an extra little tug at the end of completing a single crochet. This makes your stitches tighter so the stuffing does not show through.

      Here are some tips that are not mentioned in the lesson videos for brushing your crocheted amis:
      1. I found it easiest to collapse the piece so that it was a double thickness. This helped to protect my fingers from the brush and it did not pull the piece out of shape.
      2. Be careful when brushing near the edge. Those stitches pull easily.
      3. Start with a gentle brush stroke until you get the feel of the yarn's resistence. It is easier to brush more to get the desired look than it is to try and hide pulled stitches.

      16 August 2009

      Friendship Bag Swap

      When I saw the photo of this bag, I knew that I had to make one. When I saw that this is also a swap, well, I signed up immediately.

      This bag is for the Friendship Bag Swap, hosted by the Quilting Gallery.

      Here's the run-down,
      • Sign ups are going on now and end August 20th.
      • You receive your partner's information August 25th. It is a secret swap, so no telling who your partner is.
      • People from around the globe are participating, but you have the option if you want to ship internationally or not.
      • There is a simple online form to complete to sign up.
      • There is an optional Flickr group that you can join to share your journey.
      • The instructions are simple to follow with a lot of pictures.
      • As of now here are the stats: 221 participants, 23 countries, 6 provinces, and 39 states.
      Something that is not listed on the swap site, but I found when I looked at the Flickr site - people are filling the bags with goodies for their secret friend. I do not know if there is a dollar limit or any other restrictions. Once my registration is accepted, I intend to ask. -- UPDATE -- See Mishka's comment below. Goodies are optional in the swap.

      Even if you do not join the swap, consider making these simple little bags to hold gifts for family and friends. Autumn weddings are starting and the holidays are closer than you think!

      Have fun!

      18 July 2009

      Amigurumi! Super Happy Crochet Cute


      I am hooked (I swear, the pun was unintentional). I love the Japanese art of amigurumi. It is pronounced ah-MEE-goo-ROO-mee. Previously, I made a Frodo amigurumi. I recently found a book at my local library with several patterns for animals an food. What I like about the book is the introduction information. It details materials needed and helpful tips for working with the smaller hooks and embellishments.

      The patterns progress from easy beginner to difficult advanced. I am not fan of decorating the house with crocheted items, but some of the food patterns are so cute, I could see them in little bowls in the kitchen. These patterns introduce working with stitches you may not be accustomed to and working with some embellishments like beads. It is a good place to begin practicing with increases and decreases before you get into the involved and time consuming larger amigurumis.

      I strongly advice picking up a book about amigurumi from your local library or bookstore for all the tips and practice patterns before trying those awesome patterns you can find all over the web and esty.

      12 June 2009

      2009 Dear Jane Siggie Swap

      I received my blocks from the 2009 Dear Jane Siggie Swap. If you don't know what a siggie swap is, it is a signature block swap. Each person sews a specified block for each person that signed up for the swap. For this one, I made 79 of the same block. I then signed the center block with my name, city, state, and country. The blocks are mailed to the swap hostess. After receiving blocks from everyone, she sorts them so everyone receives one block created by each person.

      I love receiving the package in the mail and then looking and touching each one. You cannot look at a block without wondering about the person that created it.

      I received blocks from as close as the next city over and as far away as Australia. The creativity in these simple blocks is astounding. My favorites where the ones the used a stamp that represented their state. Such a simple idea, but so effective.

      If you have never participated in a quilt block swap, I recommend that you do. Do a little research to make sure that the organizer has done a swap with success in the past. Do not hesitate to email the organizer and ask how many swaps they have organized. Remember, organizing and participating in are very different.

      Also, have patience. It always takes longer to receive the packages than what is stated in the swap instructions, but life happens. Sometimes the hostess decides to wait for a few people that are late in sending their blocks. Sometimes the turn-around is too ambitious. Sorting all of the blocks is a very time consuming process and then you have to package and mail. Don't even get me started on shipping international. The hostess deserves all the respect in the world! (Thank you giggles2. I hope you know how much your work is appreciated!)

      I am working on a map that marks the location of everyone that participated in the swap. I am halfway done. When I complete it, I'll post the link. It is interesting how a swap can cross seas and bridge language barriers. (Okay, that was a bit sappy, but it is neat!)